
Not all missing teeth are created equal. Replacing a front tooth is already challenging. But when I am talking about a maxillary canine—also known as your cuspid (tooth #6 or #11)—that’s a different level altogether.
This is one of the most difficult implant cases I see in my Burbank office. Front teeth are much more difficult than back teeth.
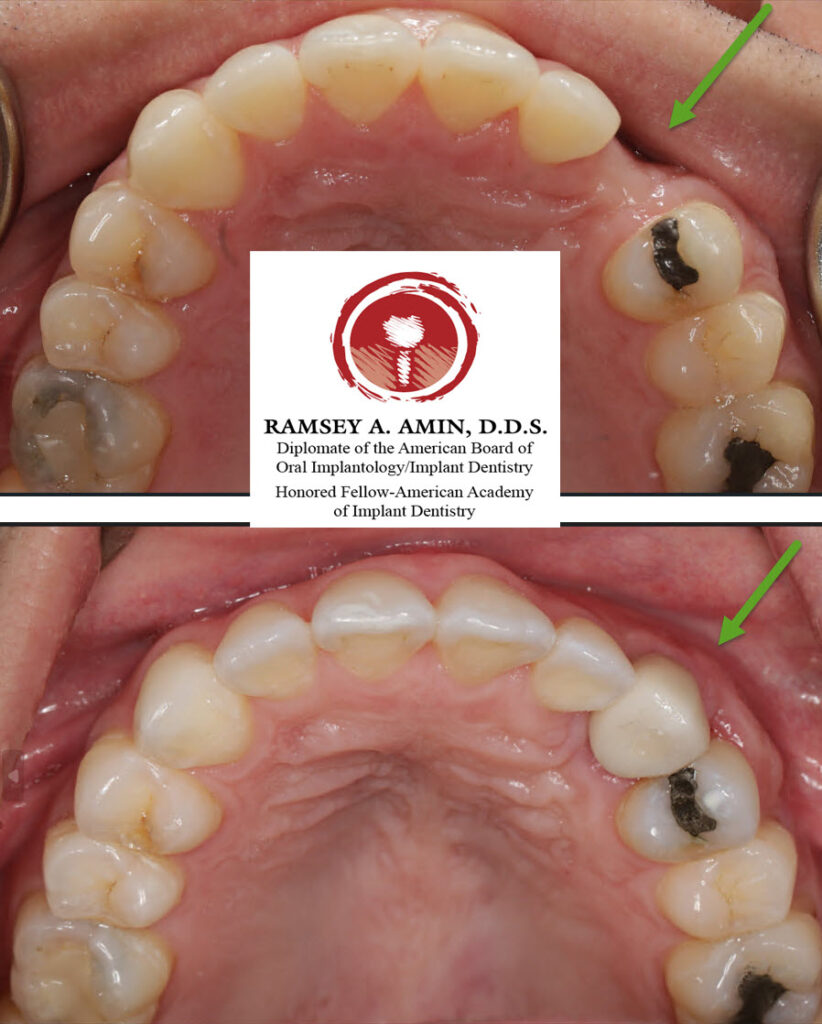
Why? Because the canine isn’t just a tooth. It’s the corner of your smile. It supports your lip, your facial profile, and even the way light reflects off your teeth. When it’s missing, both the bone and the gum tend to collapse over time—and that creates a much bigger problem to rebuild. If the dent is not filled in, the tooth will look odd compared to the rest.
Let me walk you through a real case so you can understand what’s involved.
Starting Point: Missing Bone and Gum
When a front tooth has been missing for a while, the bone shrinks—sometimes significantly. Instead of having a nice, full ridge of bone to place an implant into, we are left with a deficiency.
And here is the key: implants don’t just need bone… they need the right shape of bone AND gum.
For a canine, we actually have to build the bone outward—not just fill a hole. This is ridge augmentation.


Step One: Block Bone Graft
In this case, I performed a bone block graft (learn more about a block bone graft here).
That means we take a small piece of bone—usually from another area in the patient’s jaw by the wisdom teeth—and secure it to the deficient area with a fixation screws. Think of it like orthopedic surgery, screwing bones back together.
This graft then needs time to heal and integrate. Typically about 4 months.
During that time, the patient wears a temporary tooth (usually an Essex retainer). One important point here: we avoid flippers or anything that puts pressure on the graft. Pressure can compromise the healing.
Also, because I am adding volume, we often need to stretch or “borrow” gum tissue to cover the area. That gets refined later.


Step Two: Implant Placement + Gum Grafting
After healing, we take a new scan and place the implant.
At the same time—or shortly after—I often perform a pedicle gum graft. This involves moving gum tissue (usually from the palate) to the front to thicken the gum.
Why does this matter?
Because a canine tooth should have a natural “bulge” to it. If it’s flat, it looks artificial. Worse, over time, you can actually see changes in the face—like deepening of the nasolabial fold (that crease from your nose to your mouth).


Step Three: Shaping the Gum (This Is Huge)
This is where most people—and honestly, a lot of dentists—miss the mark.
Once the implant is placed, we don’t just throw a crown on it. We use a custom temporary to shape the gum over time (READ LINKED POST).
I explain this to patients like sitting on a beanbag. The material shifts based on pressure. Same idea here—the temporary tooth gently guides the gum into the right shape. I am not just replacing a tooth. I am sculpting the tissue so it looks natural. This phase takes several weeks, but it’s critical.


Final Step: Custom Abutment + Crown
Once everything looks right, we move to the final restoration.
In a case like this, a custom abutment is essential. It supports the gum and helps maintain the shape we created. The crown is then fabricated to match the surrounding teeth in color, contour, and symmetry.
The modern, platform switched implant also needs to be placed at the correct depth to allow for a smooth transition from the gum to the tooth—what we call the emergence profile. This is one of the keys to long-term success.


Total Treatment Time
From start to finish, this type of case typically takes around 8–10 months. It’s not fast—but done correctly, the result is stable, natural-looking, and long-lasting.
A Quick Word of Advice (This Matters)
If you have a tooth that may need to be extracted—especially in the front—don’t rush into it. The way a tooth is removed, and what’s done at that moment, can make or break the final outcome.
In many cases, we can:
- Preserve the socket with a bone graft and have avoid ALL OF THIS!
- Place an implant immediately
- Or use techniques such as a socket shield (PET) to prevent bone collapse.
If that’s done from the beginning, we can often avoid all the block bone grafting (and gum grafting) you saw in this case.
That’s a big deal!!
Final Thoughts
This patient started with a significant defect. Not ideal. But by rebuilding the bone, carefully managing the gum, and taking the time to shape everything properly, we were able to create a result that looks natural and feels solid.
Is it perfect? No case ever is—especially when I am rebuilding what’s already been lost. But compared to where we started, it’s a massive improvement. And more importantly, the patient is happy and confident again.
If you’re in Burbank or the surrounding area and dealing with a missing tooth—or you have been told you don’t have enough bone—I’m always happy to take a look and walk you through your options (potentially a block bone graft).
There is always a solution!
Ramsey Amin, D.D.S.
Diplomate of the American Board of Oral Implantology /Implant Dentistry
Honored Fellow-American Academy of Implant Dentistry